Discover comprehensive nightstand plans PDF guides, offering step-by-step instructions and detailed diagrams for crafting stylish and functional bedside tables․ Perfect for DIY enthusiasts of all skill levels․
Overview of DIY Nightstand Projects
Explore a variety of DIY nightstand projects that cater to different styles and needs․ From modern minimalist designs to rustic charm, these projects offer detailed plans and step-by-step guides․ Whether you prefer a simple table with shelves or a more complex build with drawers, there’s a project to suit every skill level․ Many plans include cut lists, tool requirements, and tips for customization, ensuring a functional and stylish addition to your bedroom․

Materials and Tools Required
Gather essential materials like plywood, pine boards, and edge banding․ Tools such as a pocket hole jig, drill, and brad nailer are crucial for assembly and finishing․
Essential Materials for Nightstand Construction
The primary materials needed include 3/4-inch plywood for the main structure, 1×2 and 1×4 pine boards for framing, and edge banding to finish raw edges․ Additional materials like wood glue, screws, and sandpaper ensure durability and a smooth finish․ These materials are versatile and suitable for both modern and rustic designs, providing a sturdy base for your bedside table while keeping the project accessible for all skill levels․
Tools Needed for Assembly and Finishing
The essential tools for assembling and finishing your nightstand include a Kreg Pocket Hole Jig for secure joints, a drill/driver for screwing components together, and a miter saw or brad nailer for precise cuts and trim․ Sandpaper, clamps, and positioning squares are crucial for ensuring a smooth finish and proper alignment․ These tools are versatile and suitable for both beginners and experienced builders, helping to achieve professional-grade results in your DIY project․
Step-by-Step Building Process
Follow detailed guides to construct your nightstand, starting with building sides, shelves, and drawers․ Ensure precise alignment and secure joints using the provided plans for a polished finish․
Constructing the Sides and Bottom Panel
Begin by cutting the side panels and bottom panel according to the PDF plans․ Use a miter saw for precise cuts and assemble the sides using wood glue and 1․25” pocket hole screws․ Attach the bottom panel to the sides with clamps and positioning squares to ensure alignment․ Secure firmly with brad nails for stability․ Sand all edges for a smooth finish before proceeding to the next step․
Installing Shelves and Drawers
Measure and cut the shelves according to the PDF plans․ Attach them to the nightstand frame using 1․25” wood screws and wood glue for stability․ For drawers, assemble the box using brad nails and attach drawer slides to ensure smooth operation․ Install the slides on both the drawer and the nightstand frame, aligning them carefully․ Secure the drawer front and test its movement before finalizing․ Sand all surfaces for a polished finish․
Assembling and Securing the Nightstand
Begin by assembling the nightstand frame using wood glue and 1․25” screws․ Clamp the sides and bottom panel together, ensuring proper alignment with positioning squares․ Attach the back panel and shelves, securing them with brad nails․ Install the drawer slides and attach the drawer to the frame․ Sand all edges for a smooth finish and ensure all components are tightly secured․ This step ensures stability and proper functionality for years to come․
Design Variations and Customization
Explore various nightstand designs, from modern to rustic, and customize to match your bedroom decor․ Add personalized touches like carved details or painted finishes for a unique look․
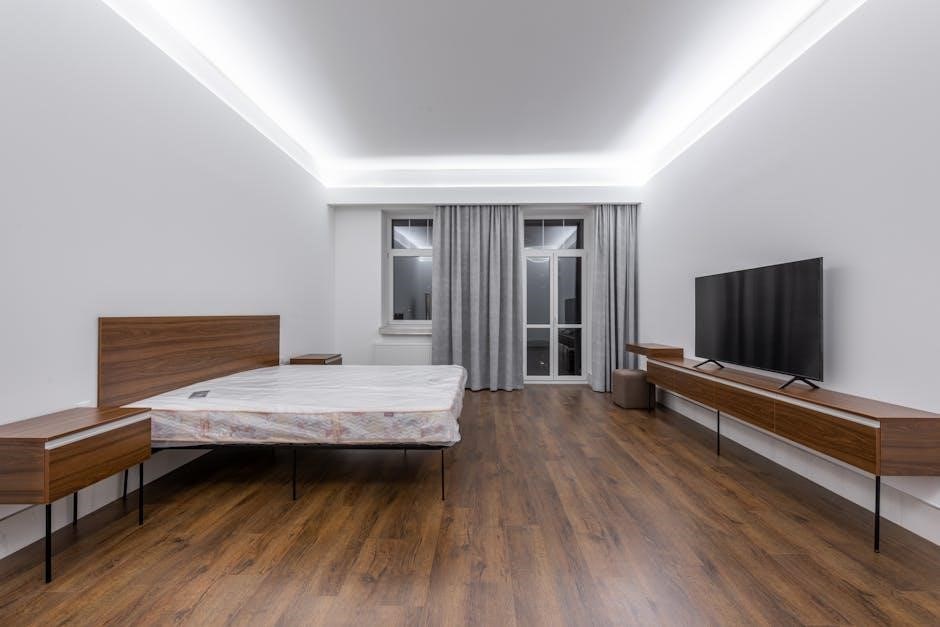
Modern vs․ Rustic Nightstand Designs
Modern nightstands feature clean lines, minimalist aesthetics, and functional designs, often with open backs for cable management․ Rustic styles emphasize natural wood textures, classic details, and a timeless, cozy appeal․ Choose between sleek, contemporary looks or charming, vintage-inspired pieces to match your bedroom decor․ Both styles offer versatility, allowing for personalization with finishes, hardware, and storage solutions to suit individual preferences and needs․
Adding Personalized Features
Elevate your nightstand with personalized touches like adding drawers, shelves, or USB ports for modern convenience․ Incorporate decorative hardware, carved details, or unique finishes to reflect your style․ Consider custom paint colors, distressing, or engravings for a one-of-a-kind piece․ Personalized features not only enhance functionality but also allow you to tailor the design to fit your bedroom decor and personal preferences, making your nightstand truly special․
Beginner-Friendly Tips and Tricks
Start by measuring accurately and cutting precisely to ensure a sturdy build․ Use clamps and positioning squares to maintain stability during assembly for professional-looking results․
Measuring and Cutting Accurately
Accurate measuring and cutting are crucial for a successful DIY nightstand project․ Use a tape measure and carpenter’s square to ensure precise cuts․ Mark wood carefully and double-check measurements before cutting․ Consider using a miter saw or circular saw for clean, straight edges․ For intricate cuts, jigs or templates can help maintain consistency․ Proper cutting ensures all pieces fit seamlessly, minimizing waste and saving time during assembly․
Ensuring Stability and Alignment
Ensuring stability and alignment is critical for a sturdy nightstand․ Use positioning squares and clamps to keep the structure square during assembly․ Attach the bottom panel to side panels with wood glue and pocket hole screws for a secure base․ Regularly verify alignment with a carpenter’s square and level․ If needed, adjust with shims or feet to ensure even surfaces, guaranteeing a stable and professional-looking final product․
Storage Solutions and Functional Features
Incorporate drawers, shelves, and USB ports for enhanced functionality․ Open backs simplify cable management, while drawers and shelves provide ample storage for books, devices, and personal items․
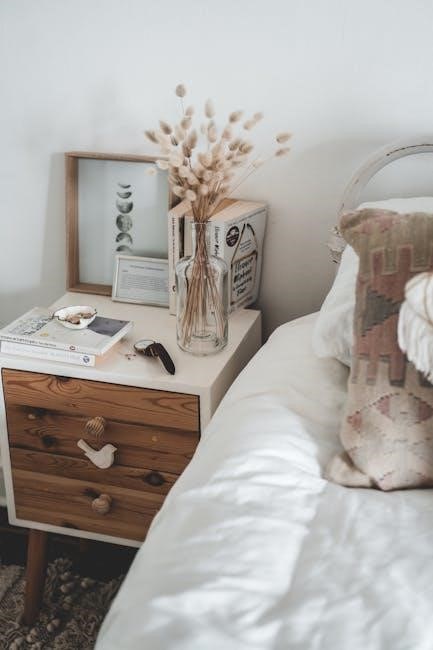
Incorporating Drawers and Shelves
Add practical storage with drawers and shelves, perfect for keeping books, devices, and personal items organized․ Drawers provide enclosed storage, while shelves offer easy access․ Use drawer slides for smooth operation and ensure shelves are level for stability․ Adjustable shelves can accommodate items of varying sizes, making the nightstand versatile․ This feature is ideal for DIYers looking to maximize bedroom functionality while maintaining a sleek, modern design․
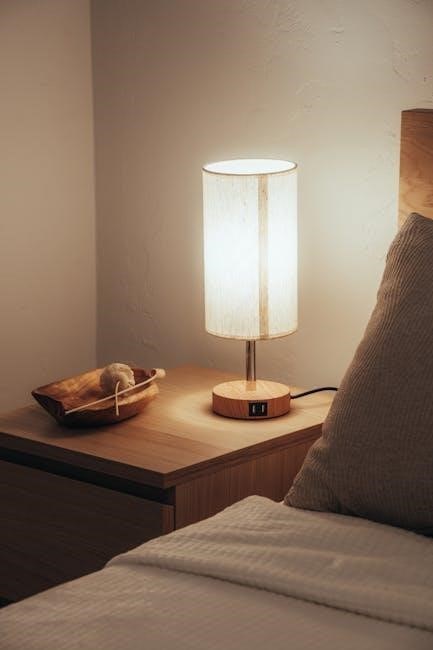
Adding USB Ports and Cable Management
Enhance your nightstand’s functionality by incorporating USB ports and cable management systems․ These features allow for convenient device charging while keeping cords organized․ Open-back designs or built-in grommets can help route cables neatly․ Install USB ports in drawers or on the surface for easy access․ This modern addition keeps your bedroom clutter-free and your devices charged, making it a practical upgrade for any DIY nightstand project․
Advanced Techniques for Experienced Builders
For experienced builders, advanced techniques like pocket holes and decorative finishes elevate your nightstand’s craftsmanship, ensuring a polished and professional final piece․
Using Pocket Holes and Brad Nailer
Pocket holes and a brad nailer are essential for creating sturdy, invisible joints in nightstand construction․ The pocket hole jig ensures precise screw placement, while the brad nailer secures panels without splitting the wood․ This method is ideal for assembling the sides, shelves, and drawers, offering a clean, professional finish․ By combining these tools, you achieve strong, alignment-accurate joints, perfect for experienced builders aiming for a polished, long-lasting piece of furniture․
Applying Wood Finishes and Decorative Elements
Enhance your nightstand with professional wood finishes and decorative touches․ Apply stains, varnishes, or paints to achieve the desired color and protection․ Add decorative elements like hardware, carvings, or metal accents for a personalized look․ Sand thoroughly before finishing to ensure smooth results․ Protective clear coats ensure durability and longevity․ These steps elevate the nightstand’s appearance, making it a stunning centerpiece in any bedroom, while also safeguarding the wood from wear and tear․

Safety Precautions and Best Practices
Ensure a safe woodworking experience by wearing protective gear, setting up a secure workspace, and following instructions to avoid common DIY mistakes and injuries․
Protective Gear and Workspace Setup
Always wear safety glasses, ear protection, and gloves when working with power tools․ Ensure your workspace is clean, well-lit, and free from clutter․ Secure materials firmly to prevent movement during cutting or drilling․ Keep loose clothing and long hair tied back․ Maintain proper ventilation when using wood finishes or adhesives․ Store tools in designated areas and keep a first aid kit nearby․ A safe setup ensures a successful and injury-free project․
Avoiding Common DIY Mistakes
To avoid mistakes, always double-check measurements and ensure accurate cuts․ Use positioning squares and clamps to maintain alignment during assembly․ Avoid rushing through steps, as this can lead to misalignment or uneven surfaces․ Double-check plans before cutting materials to prevent waste․ Test drawer slides and hinges before final installation․ Properly tighten all screws and ensure stability․ Addressing these common pitfalls ensures a professional-looking finish and functional nightstand․
Complete your project by inspecting the nightstand for stability and functionality․ Ensure all drawers and shelves operate smoothly․ Place your finished piece in your bedroom with pride, knowing it combines practical storage with personal style․
Inspecting and Testing the Nightstand
Begin by conducting a thorough inspection of your nightstand to ensure all components are secure and properly aligned․ Use a level to verify that the surface is even and stable․ Check drawers and shelves for smooth operation, ensuring they open and close effortlessly․ Inspect the finish for any imperfections or rough edges․ Test the weight capacity by placing a moderate load on the surface․ Finally, ensure all hardware is tightly secured for safety and durability․
Final Assembly and Placement
Once all components are thoroughly inspected, proceed with the final assembly by ensuring all parts are securely fastened․ Position the nightstand in your desired location, using a level to confirm it is even and stable․ Tighten all hardware one last time for maximum stability․ Arrange your belongings neatly, ensuring proper spacing and accessibility․ Double-check that drawers and shelves function smoothly before final placement in your bedroom․
Leave a Reply